Your gateway to endless inspiration
Tutorial - Blog Posts

THX 2 CGcookie https://www.youtube.com/watch?app=desktop&v=y2D7MwaeFq0&feature=youtu.be&utm_content=buffer2f818&utm_medium=social&utm_source=twitter.com&utm_campaign=twitter
Boling Water with bubbles effekt tutorial
hai omg your layout is so cute what the eff how is your text so kawaii
omg hii you’re literally the sweetest ever what the freak… thank you so much!! i’m really happy you like my layout hehe. and aaa yes!! the text color thing is actually super easy once you get the hang of it, i promise. i’ll walk you through everything step by step so you can make your text all cute and colorful too!!
how to make your text colored on tumblr (desktop only)
ok so first!! you’ll need a couple of websites to help you out, depending on how you want to pick your color(s):
if you want to pick colors from an image:
https://imagecolorpicker.com
you can upload a pic or paste an image URL, then click anywhere on it to grab the hex color code! super helpful if you’re trying to match a vibe or palette.
if you just want to browse and choose a color:
https://htmlcolorcodes.com/color-picker/
this one lets you scroll through all sorts of shades and gives you the hex code instantly.
once you’ve picked your color(s), you’ll go here:
https://www.stuffbydavid.com/textcolorizer
this is where the magic happens. you’ll paste in your text and your color code, and it’ll give you the html version of it!
example of what this might look like:


now hop over to tumblr (on desktop!! not the app):
1. start a new post and type what you want like normal
2. then click the little gear icon in the top right and switch from “rich text” to “html”
3. paste in the code you got from the text colorizer
4. once it’s in, you can switch back to regular rich text and it should stay all pretty and colored!

(excuse the wonky gif tutorial i did this on my phone in class oopsie)
and that’s it!! super simple once you do it once or twice. i hope this helps a bunch and you have fun customizing your posts — it’s such a cute way to make things feel more you!!
if you need help with anything else or want more custom color ideas just lmk!
🐟How I made Hook Line & Sniper's water physics 🐟

I always love dynamic pixel art effects, so with my game being highly fish-centric, I spent a lot of time making the water look just right.
First, our starting point: just a semi-transparent Polygon2D. It has several points across the top, which I can move around to make interesting shapes. Note that, unlike some more complicated fluid simulations, I won't be simulating tons of water particles throughout the body of water. I only care about the curve that makes up the top of the ocean.
At this point, we already have a bit of the pixel-art look, since the whole game is drawn to a lower resolution texture.

Next step: adding interaction. I essentially model each of the polygon's points as a spring. Each point has a velocity, and based on its distance from the resting height, I pull it back according to Hooke's law. To make it look like one connected body of water, each point gives a bit of its velocity to nearby points.
Now, whenever the player enters or exits the water, I apply an impulse to the nearest point, and that's enough for some fairly convincing water :D

Finally: polishing up the visuals. To greatly improve the look of the water, I put the whole thing through a shader. I gave the water a pixel-perfect outline by checking if the adjacent pixels are also water. I wanted the water to have a shallow color and a deeper color, which I achieved by checking if there's still water several pixels above the current pixel. (To make it look more natural, this depth test is very subtly randomized based on the pixel's position)

This shader gives me a ton of room for other neat effects. For example, in the final product you'll notice there's a nice splash effect. This is just a simple particle system, but since it goes through the same shader, it blends with the water perfectly.
Since the game has 5 worlds, the shader lets me easily swap out the water's color palette to make each one stand out.
I'm super happy with how world 2's sun reflection turned out, which makes very heavy use of procedural dithering.

Thanks for reading my ramble <3 The game is on Steam now if you want to see the water for yourself!


I’m new to tumblr (format not content) and would appreciate someone taking me under their wing

Mermaid Fin tutorial! This is just how I do it though, thought it would be helpful to have out there with Mermay started!
If this does well I might do some more if it’s wanted!
My animation process (in a GIF!)

So you've learned the 12 principles of animation but don't know where to actually apply them? Fear not!! For here is my step-by-step process, very very condensed, into one singular giant GIF.
Hope it helps!
(You may need to open it in a new tab to read the text)

so I was drawing eye if you guys want to use them I can have examples for you and I’ll probably do hair, hands, base, and more
Free lessons!


Drawing Academy’s Free Drawing Video Lessons.
Sponsoring Supersonic this week is the online artist teaching resource Drawing Academy and they’re offering several free, online video drawing classes for Supersonic readers (Plus more to come, stay tuned). The free classes also come with other valuable materials such as free eBooks, guides and art albums.
To sign up and receive your free art lessons simply head over to Drawing Academy.
I rate it 10/good
What to do when you don’t like a fic: a step by step guide
Step 1:


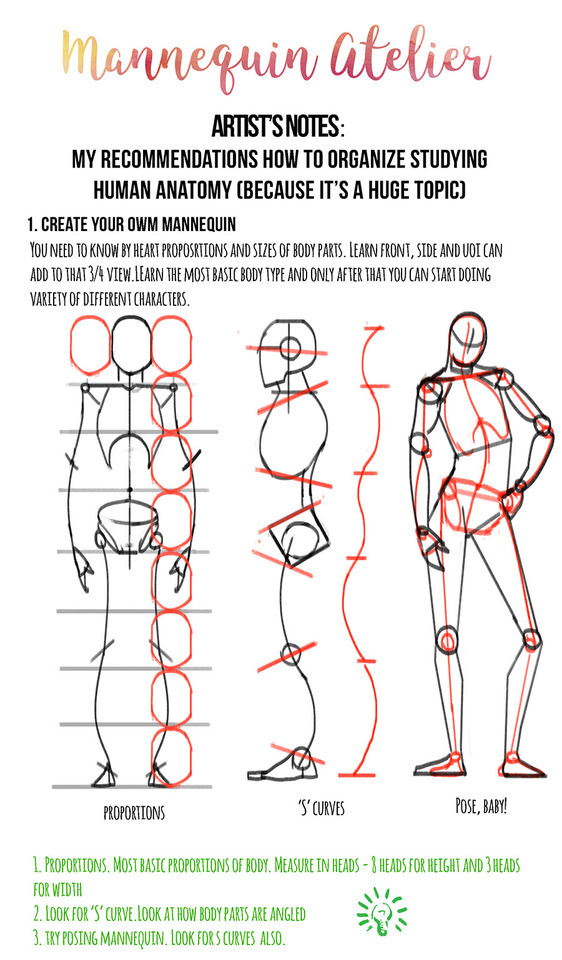


This one was a popular demand. Many people people asked me about anatomy tips.
I know how hard this topic is and how confusing at the beginning. It’s just so much to learn! Exactly! I remember how lost I was in the beginning and trying out things that actually didn’t help me understand anatomy better.
Actually what I want to convey here is that you can learn to draw human without learning all the muscles and bones. My personal opinion, based on experience is actually that you can do that as something extra. Learning muscles and bones won’t help you draw. True story.
If you grasps few essential concepts first you will be better off, plus you will be actually drawing characters. You will be more confident in your lines and gain knowledge that will be enough to create artwork you want.
Look at body as any other object you want to draw. Simplifying and remembering the simplest ideas is way to go.
Remember: these few ideas I am presenting are just a tip of an iceberg. As you will progress you will expand your knowledge beyond few essential points.
This is my personal approach so I can’t say it will work for you. I know that it works for me
Hope you like it!


Hey friends!
Sorry for the late TUTOR TUESDAY, but here it is! Today is on clothing folds and was a recommendation from @kitemist, thanks! If you have any recommendations you’d like to see send ‘em in here or my personal! Hopefully I can expand on clothes more soon! Keep practicing, have fun, and I’ll see you next week!
Differences between DXT5 / DXT3 / DXT1


The images above are all imported with SimPe's Built DXT... option, and then exported for previewing. The short version is:
You can't go wrong with DXT5 :)
I'll go through the differences under the cut.
DXT5
Supports transparency (alpha channel)
Preserves texture details well
Smooth gradient transparency
Filesize of the vase texture: 25 KB Filesize of the plant texture with gradient alpha channel: 26 KB Filesize of the plant texture without the gradient part: 20 KB
Useful for: textures that are solid or have a complex alpha channel.
Shouldn't be used for: –
DXT3
Supports transparency (alpha channel)
Preserves texture details well
Causes stripes on alpha channel gradients
Filesize of the vase texture: 25 KB Filesize of the plant texture with gradient alpha channel: 20 KB Filesize of the plant texture without the gradient part: 19 KB
Useful for: textures that are solid or have a well-defined alpha channel.
Shouldn't be used for: textures with alpha channel gradients.
DXT1
Doesn't support transparency (no alpha channel)
Pixelates texture details
Filesize of the vase texture: 21 KB Filesize of the plant texture: 14 KB
Useful for: solid one color textures with no details.
Shouldn't be used for: detailed textures, textures with transparency.
Both textures l used are 256x256. They came from TS4, thanks to @tvickiesims for extracting the textures! I added the gradient bit to the plant one.
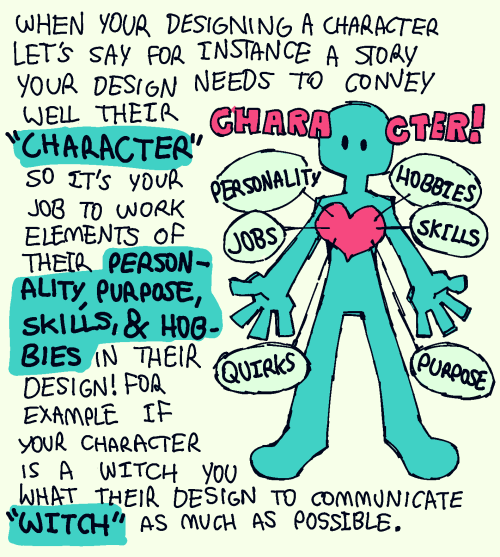

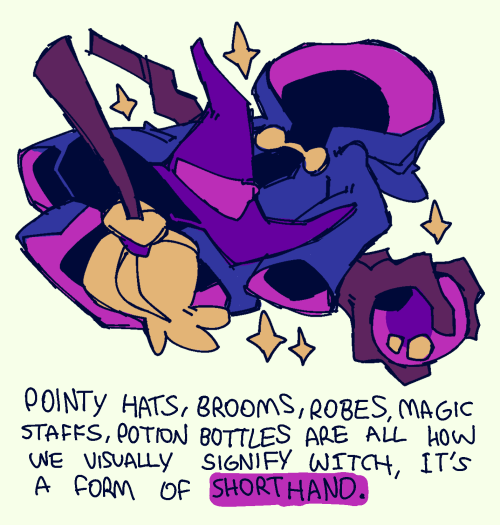
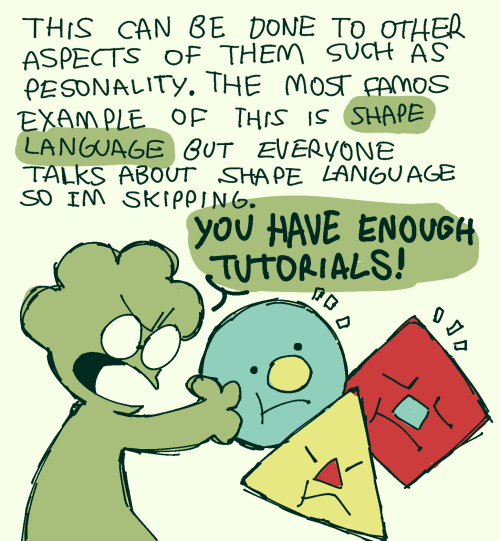
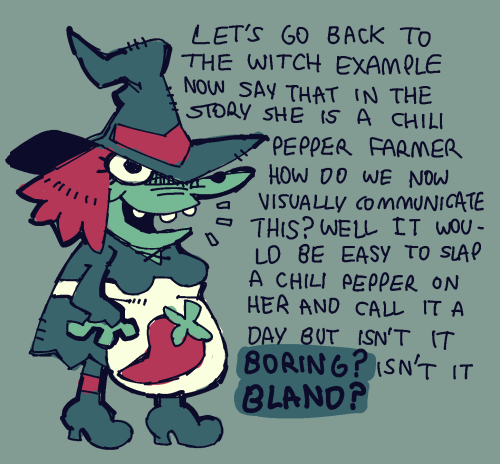
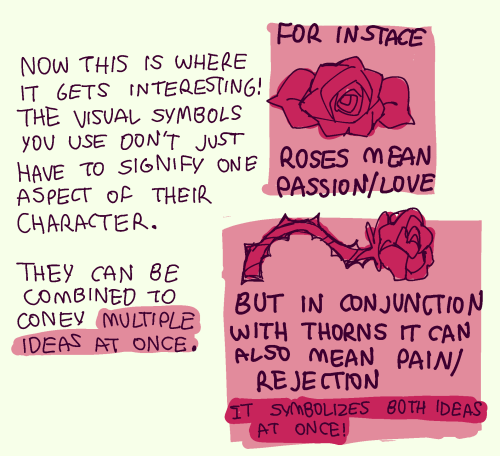


Ok so i wanted to make a little dumb rant about some of my thoughts on character design and what not!
![First slide. The title reads "drawing characters with Down syndrome". Below that: "myth that I need to get out of the way before the actual tutorial: [caps] people with DS do not look the same [end caps]. They share similar features, but there is no one face that every person with DS has. Most people with DS won't have every single trait, just pick what works for your character." Around that are three actual photos; from top to bottom; a photo of the actress Gigi Cunningham, a Black woman in her 20s posing with her hands on hips; a photo of Zhou Zhou, a Chinese man in a suit conducting an orchestra; portrait photo of Georgie Wildgust, an elderly white man smiling to the camera. Each photo is captioned with the person's name.](https://64.media.tumblr.com/7f4403fd328c284d5bae6ca90eaa6d07/18bf095cd4118d2a-d1/s500x750/6feee60a3e2b462d399245d34ba50f6db14afac6.png)


![fourth slide, called "eyes". text reads "probably the most characteristic feature, so it's important to get right. People with Mosaic Down syndrome (more on it later!) will often have this as one of the few visible traits". top right has a close-up of a blue iris with white dots going around the pupil. It's captioned "these white spots going in a circle are called Brushfield spots. A lot of people with DS have them". Below that is a step-by-step tutorial on drawing eyes. First step focuses on the general shape, with the text reading "there's a lot of shapes to choose from: almond; round; upturned; + more but these are most common". Each of them has a drawing attached. Step two focuses on eyelids. Text reads "pronounced eyelids, both bottom and upper ones. They have a very noticeable crease". There's two pairs of eyes with heavy eyelids under that. Step three shows wrinkles around the eyes. Text: "some people with DS will have creases around the eyes + large bags under the eyes; if you have a simpler artstyle probably skip this one". Attached drawing shows a pair of eyes with wrinkles coming form the upper eyelid on the outer side and bags under the eyes. Step four reads "give them strabismus [many exclamation points]! I know artists are allergic to drawing strabismus if it's not for a joke but crossed eyes are actually awesome [awesome in all caps], (ok not all have strabismus but like half do)". Drawing attached shows a person with DS and strabismus.](https://64.media.tumblr.com/2f7b683cb96ee98791b5e27baca3494b/18bf095cd4118d2a-f1/s500x750/04920f4b30096952d3d5d015dd10e6b840b6be70.png)


tutorial for drawing characters with Down syndrome!
DISCLAIMER... please keep in mind that this is an introductory drawing tutorial and has some generalizations in it, so not every “X is Z” statement will be true for Actual People. it's more of an overview of features that are common in people with Down syndrome, not meaning to imply that every person with DS has all of them 👍👍 thanks
if you draw any characters using this feel free to tag me!!
Steven Universe Color Correction!
I was doing some screenshot edits when I had a brainfart and decided to find out the colors of the zircons and the wormy boi.
Basic Tutorial
There are a number of different types of blending modes for layers, as many of you undoubtedly know. Most screenshots from SU that are worth editing seem to have a darker shade, similar to a multiply layer.
Anyone who passed 5th grade math knows that the opposite of multiply is divide, which also happens to be a blending mode.
So, the method I used to correct my colors goes as follows:
Load your screenshot into your art program
Add a new layer and set the blending mode to divide. Hide this layer for now.
Find something on the screenshot that would be white under normal lighting. Eyes, teeth and the like.
Use the eydropper tool to copy the color on one of these areas.
Make the divide layer visible, and use the bucket/fill tool to fill the layer with the color you copied.
Tada! You should now have an edited screenshot with accurate colors.
Actual Theories
Remember when the biggest controversy in the fandom was if the prosecuting Zircon was yellow or green? Simpler times. Anywho: I used the same method, and...


Why yellow there.
I cross checked this with other people's edits, and it seemed pretty consistent. She yello!
I decided to do the defending Zircon just for fun:


So, next bit: Wormy Boi.
@novantinuum made an interesting post about the similarities in scenery and lighting between the Wormy Boi's title sequence appearance and a number of scenes in the most recent trailer. I sampled the color from the trailer, put it on the title sequence, and well... the results speak for themselves.
This is how a trailer scene looked before it was fixed:

This is how a trailer scene looks when fixed:

And the Worm?

Yup.
Please tell me if there is any way to improve my method!
Also, I’m working on the high school AU thing.
- Pasta